Identity Providers (Single Sign-on)
Omnistrate allows configuring Single Sign-on (SSO) for your Customer Portal. This feature enables end users to authenticate into the Customer Portal using existing identity provider credentials, such as Google, GitHub, Microsoft Entra, and many others.
For enterprise customers, this means they can leverage their existing enterprise identity (such as Microsoft Entra / Active Directory, Okta, Auth0, or Keycloak) to provide seamless authentication. This integration allows to maintain centralized user management, enforce corporate security policies, and provide a familiar login experience.
This feature is an addition to the username/password authentication mechanism provided by default. You can disable the default username/password authentication updating the Customer Portal configuration and rely solely on identity providers for user authentication.
What is OpenID Connect?
SSO uses the OpenID Connect protocol for authentication, which is built on top of OAuth 2.0 and provides standardized identity verification.
How OpenID Connect Authentication Works
When a user clicks on an identity provider login button in your Customer Portal, the following authentication flow occurs:
- Initiation: The user is redirected to the identity provider's authorization endpoint
- Authentication: The user authenticates with their identity provider (e.g., enters Google credentials)
- Authorization: The identity provider asks the user to authorize your application to access their profile information
- Callback: The identity provider redirects back to your User Portal with an authorization code
- Token Exchange: Omnistrate exchanges the authorization code for an access token and ID token at the provider's token endpoint
- User Information: Omnistrate retrieves the user's profile information from the provider's user info endpoint or the token
- Session Creation: A user session (JWT token) is created in your Customer Portal using the verified identity information
This flow ensures secure authentication while maintaining user privacy and following industry standards.
Supported Identity Providers
Omnistrate supports the following identity providers:
- Google - Google Workspace and personal Google accounts
- GitHub - GitHub OAuth applications
- Amazon Cognito - AWS managed identity service
- Microsoft Entra (formerly Azure AD) - Microsoft's identity platform
- Okta - Enterprise identity management
- Auth0 - Identity-as-a-Service platform
- Keycloak - Open-source identity and access management
- OpenID Connect - Any OpenID Connect compliant provider
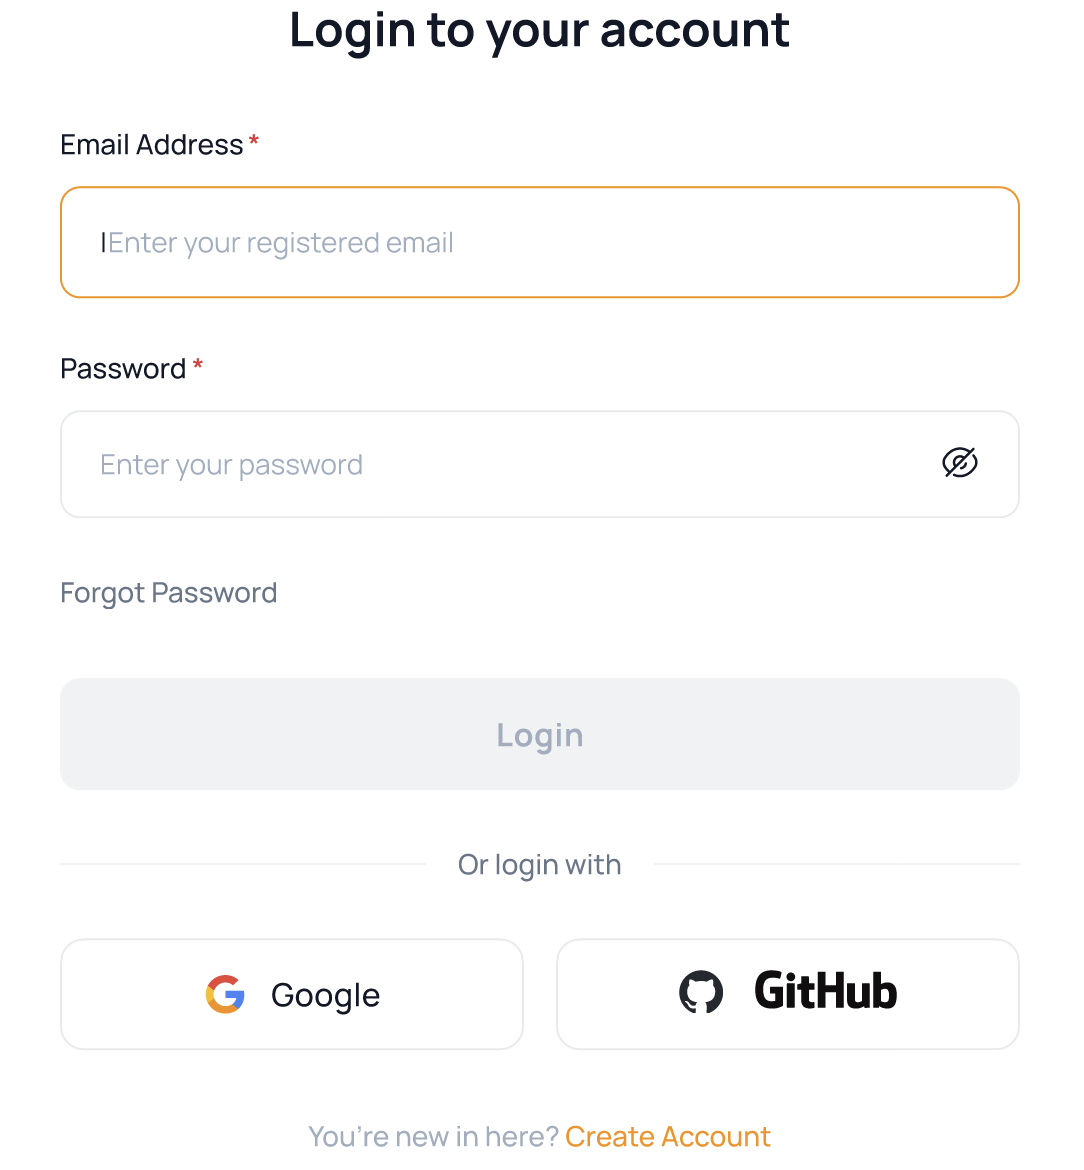
Once the SSO Identity Provider(s) are configured, users can login to your SaaS application using the buttons on the login page.
Configuration Settings
When configuring an identity provider, you'll need to provide the following information:
Required Settings
- Client ID: The client ID of the identity provider application
- Client Secret: The client secret of the identity provider application
OpenID Connect Endpoints
The behavior of these endpoints depends on the provider type:
Fixed Endpoint Providers (Google, GitHub): These providers have well-known, fixed endpoints that Omnistrate automatically configures. You don't need to specify these endpoints manually as they are built into the platform.
Configurable Endpoint Providers (Amazon Cognito, Microsoft Entra, Okta, Auth0, Keycloak, Generic OpenID Connect): For these providers, you can specify custom endpoints or let Omnistrate auto-discover them from the provider's OpenID Connect discovery document.
- Authorization Endpoint: OAuth2 endpoint to initiate the authentication request
- Token Endpoint: Endpoint used to exchange authorization code for access and ID tokens
- User Info Endpoint: Endpoint to fetch authenticated user's information
Optional Settings
These settings allow you to customize how the identity provider appears and behaves in your Customer Portal:
-
Scopes: OAuth scopes (space separated) defining what information will be accessed from the identity provider (e.g.,
openid email profile). This determines what user information Omnistrate can retrieve and display in the Customer Portal. Common scopes include:openid: Required for OpenID Connect authentication flow (enables ID token generation)email: Access to user's email address (displayed in user profile)profile: Access to basic profile information like name and avatar (displayed in user profile and throughout the portal).
-
LoginButton Icon URL: A URL to a custom image used as the icon on the login button in your Customer Portal. This allows you to:
- Brand the login experience with your identity provider's logo
- Use custom icons that match your portal's design theme
- Provide visual recognition for users familiar with the identity provider
- If not specified, Omnistrate will use a default icon for the provider type
-
Login Button Text: Custom text displayed on the login button in your Customer Portal. This allows you to:
- Customize the call-to-action text (e.g., "Continue with Google" vs "Sign in with Google")
- Use language that matches your brand voice
- Provide context-specific messaging for different user types
- If not specified, Omnistrate will use default text like "Continue with [Provider Name]"
-
Email Identifiers: Configure specific email domains (comma-separated) that should authenticate using this provider (e.g.,
omnistrate.com, google.com). This setting:- Automatically directs users with matching email domains to this identity provider
- Helps streamline the login experience for enterprise users
- Can be used to enforce corporate authentication policies
- Allows different email domains to use different identity providers
- If not specified, the identity provider will be available to all users regardless of email domain
Provider Setup Instructions
For all identity providers, you must create an OAuth 2.0 Application configured for Web Applications. This is essential for the OpenID Connect authentication flow to work properly with your Customer Portal. Each provider has specific steps to create and configure these OAuth applications as detailed below.
Google
Google uses fixed, well-known OpenID Connect endpoints that are automatically configured by Omnistrate. You only need to provide the Client ID and Client Secret.
- Go to the Google Cloud Console
- Create a new project or select an existing one
- Enable the Google+ API
- Go to Credentials → Create Credentials → OAuth 2.0 Client IDs
- Configure the OAuth consent screen if not already done
- Set Application type to "Web application"
- Add your SaaS domain URL to Authorized JavaScript origins
- Add your SaaS domain URL with
/idp-authendpoint to Authorized redirect URIs - Copy the Client ID and Client Secret
Fixed Endpoints (automatically configured):
- Authorization:
https://accounts.google.com/o/oauth2/v2/auth - Token:
https://oauth2.googleapis.com/token - User Info:
https://openidconnect.googleapis.com/v1/userinfo
Required Scopes: openid email profile
Documentation: Google OAuth 2.0 Setup
Note
If your Google application is set to "Internal" user type, only users within your organization (@your-organization.com) will be able to authenticate with this Identity Provider. Omnistrate is not able to verify your Identity Provider credentials in this case.
GitHub
GitHub uses fixed endpoints that are automatically configured by Omnistrate. You only need to provide the Client ID and Client Secret.
- Go to your GitHub account Settings → Developer settings → OAuth Apps
- Click New OAuth App
- Fill in the application details:
- Application name: Your SaaS application name
- Homepage URL: Your SaaS domain URL
- Authorization callback URL: Your SaaS domain URL with
/idp-authendpoint - Click Register application
- Copy the Client ID and generate a Client Secret
Fixed Endpoints (automatically configured):
- Authorization:
https://github.com/login/oauth/authorize - Token:
https://github.com/login/oauth/access_token - User Info:
https://api.github.com/user
Required Scopes: read:user user:email
Documentation: GitHub OAuth Apps
Amazon Cognito
- Go to the AWS Cognito Console
- Select your User Pool or create a new one
- Go to App integration → App clients
- Create a new app client or select an existing one
- Configure the app client:
- Enable Authorization code grant
- Add your SaaS domain URL with
/idp-authto Allowed callback URLs - Add required scopes:
openid,email,profile - Note down the Client ID and Client Secret
- Find your Cognito domain under App integration → Domain
Endpoints:
- Authorization:
https://your-domain.auth.region.amazoncognito.com/oauth2/authorize - Token:
https://your-domain.auth.region.amazoncognito.com/oauth2/token - User Info:
https://your-domain.auth.region.amazoncognito.com/oauth2/userInfo
Documentation: Amazon Cognito OAuth 2.0
Microsoft Entra (Azure AD)
- Go to the Azure Portal
- Navigate to Azure Active Directory → App registrations
- Click New registration
- Configure the application:
- Name: Your SaaS application name
- Supported account types: Choose appropriate option
- Redirect URI: Web - Your SaaS domain URL with
/idp-auth - Go to Certificates & secrets → Client secrets → New client secret
- Copy the Application (client) ID and Client secret value
Endpoints (replace {tenant-id} with your tenant ID):
- Authorization:
https://login.microsoftonline.com/{tenant-id}/oauth2/v2.0/authorize - Token:
https://login.microsoftonline.com/{tenant-id}/oauth2/v2.0/token - User Info:
https://graph.microsoft.com/oidc/userinfo
Required Scopes: openid email profile
Documentation: Microsoft Identity Platform
Okta
- Go to your Okta Admin Console
- Navigate to Applications → Applications
- Click Create App Integration
- Select OIDC - OpenID Connect and Web Application
- Configure the application:
- App integration name: Your SaaS application name
- Grant type: Authorization Code
- Sign-in redirect URIs: Your SaaS domain URL with
/idp-auth - Copy the Client ID and Client secret
Endpoints (replace {your-okta-domain} with your Okta domain):
- Authorization:
https://{your-okta-domain}/oauth2/default/v1/authorize - Token:
https://{your-okta-domain}/oauth2/default/v1/token - User Info:
https://{your-okta-domain}/oauth2/default/v1/userinfo
Required Scopes: openid email profile
Documentation: Okta OIDC Web App
Auth0
- Go to your Auth0 Dashboard
- Navigate to Applications → Applications
- Click Create Application
- Choose Regular Web Applications
- Go to the Settings tab:
- Allowed Callback URLs: Your SaaS domain URL with
/idp-auth - Allowed Web Origins: Your SaaS domain URL
- Copy the Client ID and Client Secret
Endpoints (replace {your-auth0-domain} with your Auth0 domain):
- Authorization:
https://{your-auth0-domain}/authorize - Token:
https://{your-auth0-domain}/oauth/token - User Info:
https://{your-auth0-domain}/userinfo
Required Scopes: openid email profile
Documentation: Auth0 Regular Web App
Keycloak
- Access your Keycloak Admin Console
- Select your realm or create a new one
- Go to Clients → Create client
- Configure the client:
- Client type: OpenID Connect
- Client ID: Your application identifier
- In the client settings:
- Access Type: Confidential
- Valid Redirect URIs: Your SaaS domain URL with
/idp-auth - Web Origins: Your SaaS domain URL
- Go to Credentials tab and copy the Secret
Endpoints (replace {keycloak-server} and {realm} with your values):
- Authorization:
https://{keycloak-server}/auth/realms/{realm}/protocol/openid-connect/auth - Token:
https://{keycloak-server}/auth/realms/{realm}/protocol/openid-connect/token - User Info:
https://{keycloak-server}/auth/realms/{realm}/protocol/openid-connect/userinfo
Required Scopes: openid email profile
Documentation: Keycloak OpenID Connect
Generic OpenID Connect
For any OpenID Connect compliant provider:
- Register your application with the identity provider
- Configure the redirect URI to your SaaS domain URL with
/idp-auth - Obtain the Client ID and Client Secret
- Find the OpenID Connect discovery document (usually at
/.well-known/openid_configuration) - Extract the required endpoints from the discovery document
Required Information:
- Client ID and Client Secret
- Authorization Endpoint
- Token Endpoint
- User Info Endpoint
- Supported scopes (minimum:
openid email, recommended:openid email profile)
Setting Up Identity Providers in Omnistrate
- Navigate to the Identity Providers section in Omnistrate
- Click Add Identity Provider
- Select your identity provider from the dropdown
- Fill in the required configuration:
- Client ID: From your identity provider application
- Client Secret: From your identity provider application
- Scopes: Required scopes (typically
openid email profile) - Endpoints: Auto-filled for known providers, manual entry for generic OpenID Connect
- Configure optional settings:
- Login Button Text: Custom text for the login button
- Login Button Icon URL: Custom icon for the login button
- Email Identifiers: Restrict to specific email domains
- Click Verify to test the configuration
- Click Save to enable the identity provider
Per-Environment Identity Provider Configuration
Omnistrate supports configuring different identity providers (IdPs) for each environment (for example, development, staging, and production). This allows you to:
- Use a test identity provider in development environments for easier debugging and faster iteration.
- Enforce corporate SSO only in production, while allowing password-based login in development.
- Configure separate client credentials per environment to isolate authentication traffic.
How it works
Each environment in Omnistrate maintains its own set of identity provider configurations. When you add or modify an identity provider, the configuration applies only to the environment you are currently working in.
Setting up per-environment identity providers
- Navigate to the Identity Providers section in Omnistrate.
- Select the environment you want to configure from the environment dropdown in the top navigation bar.
- Add or modify identity providers for that environment following the standard setup instructions.
- Repeat for each environment as needed.
Tip
Use a dedicated OAuth application per environment in your identity provider (for example, separate Google OAuth apps for development and production). This ensures callback URLs, usage metrics, and access controls are isolated between environments.
Note
Changes to identity provider configuration in one environment do not affect other environments. Each environment operates independently.
Advanced Security Features
By integrating with enterprise identity providers, you can bring advanced security features to your Customer Portal:
SAML Support
Many identity providers (such as Microsoft Entra, Okta, Auth0, and Keycloak) support SAML (Security Assertion Markup Language) authentication. When users authenticate through these providers, they benefit from SAML's enterprise-grade security features, including:
- Single Sign-On across multiple applications
- Centralized user management and provisioning
- Advanced session management and timeout policies
- Detailed audit trails and compliance reporting
Multi-Factor Authentication (MFA)
Identity providers that support MFA can automatically extend this security to your Customer Portal. When configured at the identity provider level, users will be required to complete additional authentication factors such as:
- SMS or email verification codes
- Authenticator app tokens (Google Authenticator, Microsoft Authenticator, etc.)
- Hardware security keys (FIDO2/WebAuthn)
- Biometric authentication
- Push notifications to mobile devices
The MFA enforcement is handled entirely by the identity provider, so no additional configuration is needed in Omnistrate once the identity provider is set up.
Disabling Default Authentication
For organizations that want to enforce SSO-only access, you can disable the default username/password authentication mechanism in your Customer Portal settings. This ensures that all users must authenticate through your configured identity providers, providing:
- Centralized access control
- Consistent security policies
- Simplified user management
- Enhanced compliance with corporate security requirements
Troubleshooting
Common Issues
- Invalid redirect URI: Ensure the redirect URI in your identity provider matches exactly:
https://your-saas-domain.com/idp-auth - Scope errors: Make sure you've included the required scopes:
openid email profile - Domain restrictions: Check if your identity provider has domain restrictions that might block authentication
- HTTPS requirement: Most identity providers require HTTPS for production use, Omnistrate ensures this is configured for the SaaS Portal, but if you are running the portal on your own environment (in particular in development environments) pls be mindful of this restriction.
Testing Your Configuration
Omnistrate performs best effort validation of your identity provider configuration while you enter the data. This includes checking the format of URLs, validating required fields, and testing connectivity to endpoints where possible. However, we strongly recommend thorough testing in a development environment before enabling identity providers in production.
Important
While Omnistrate validates configuration data during entry, the complete authentication flow can only be fully tested with real user interactions. Always perform comprehensive testing in development before enabling in production environments.
For additional support, contact us at [email protected].