SaaS billing with Omnistrate
Billing for your Service
Omnistrate supports usage-based billing for your customers with two main options:
- SaaS Providers can manage complete customer billing workflow through Omnistrate. This includes usage metering, pricing configuration, quota management, automatic invoice generation and notifications, invoice management, and integration with payment processors.
- SaaS Providers with existing billing systems will be able to collect usage metering data from Omnistrate and integrate them with their billing system.
End-to-End Billing
Omnistrate provides a complete solution for usage-based billing for your service. It provides the following features:
- Metering: Collect usage data for your service
- Aggregation: Aggregate usage data across all the nodes of an instance and per customer
- Invoicing: Generate invoices for your customers
- Payment: Integrate with payment processors to collect payments
- Pricing plans: SaaS Providers can configure pricing plans for their service and enforce quotas/restrictions per service-plan.
- Notifications: Notify customers about their invoices and show them the current usage.
- Payment collection: Receive payments to your account when customers accept their invoices.
Billing can be enabled for your Plan with the following steps:
- Enable Tenant Billing
- Connect Omnistrate with your Stripe Account (or bring your own billing provider)
- Configure pricing and billing provider for your Plan
- Configure quotas for your Plan (optional)
Invoices, Notifications and Payment collection are automated.
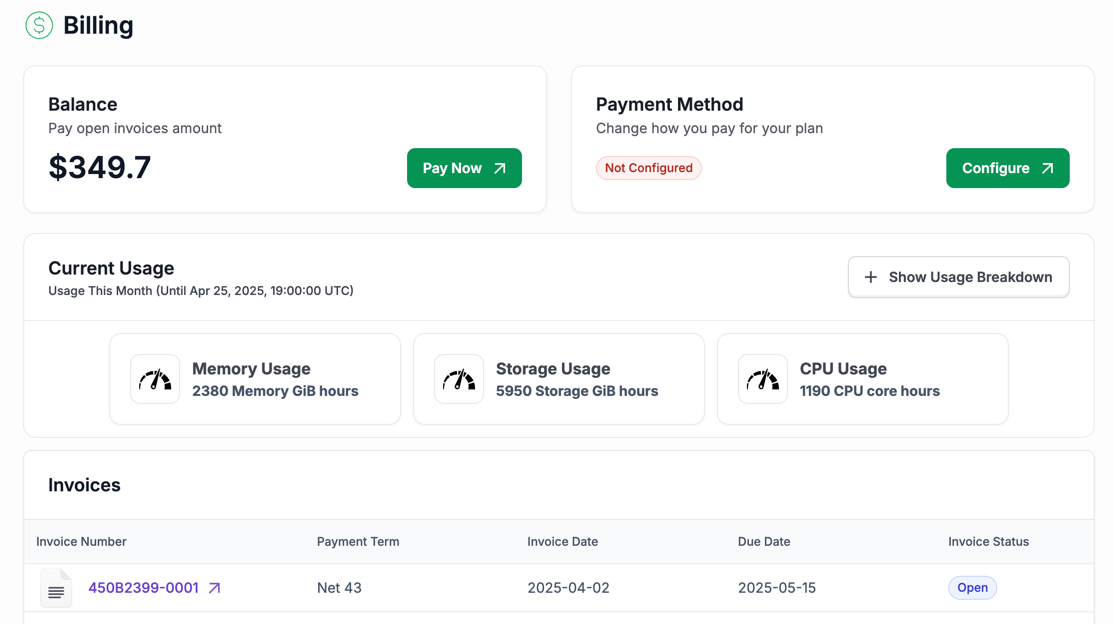
By enabling this, your customers will be able to track their usage and invoices through the customer portal. Your customers will have the ability to configure payments with Stripe and pay their invoices through the Customer Portal.
Enable Tenant Billing At Account Level
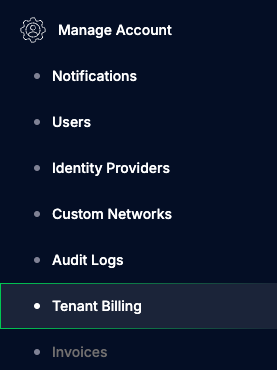
To enable tenant billing at account level, please navigate to the "FinOps Center > Tenant Billing" section. As a SaaS Provider, you can request Omnistrate to enable the feature.
When the feature is enabled, you will see the "Add Billing Provider" button. Click on it to configure your billing provider. You can choose between using Omnistrate's billing provider(Stripe) or bringing your own billing provider.
OmniBilling (Stripe)
Omnistrate provides a built-in billing provider that integrates with Stripe. This allows you to manage your customer billing workflow through Omnistrate, including usage metering, pricing configuration, quota management, automatic invoice generation and notifications, invoice management, and integration with payment processors.
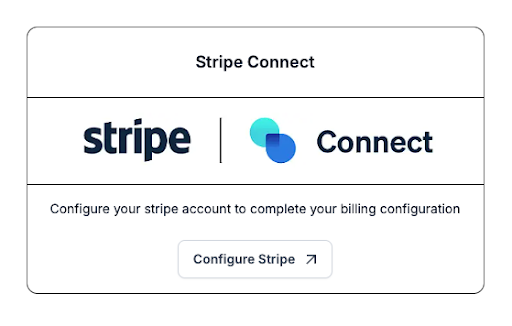
You can configure your Stripe account and set up billing for your service. To complete the Stripe enablement you need to configure your Stripe Account using “Stripe Connect”.
If you don't have a Stripe Account, you must set up a standard Stripe account. Enter all required business information, including address and payment details, so the platform can process payments successfully. For more information on how to create a Stripe account you can review the Stripe's Getting Started guideline.
Warning
Make sure to configure and save the Customer Portal properties, including your logo, data that will be requested from you customers (for instance Billing address for tax purposes) and accepted payment methods.
For more details on how we establish the connection, see the Stripe Documentation on how Stripe Connect works.
BYO-Billing Provider (Bring Your Own Billing Provider)
If you have an existing billing provider, you can integrate it with Omnistrate. This allows you to collect usage metering data from Omnistrate and integrate them with your billing system. You can enable the "Omnistrate Metering" feature at the plan level to collect usage data and export it to your S3/GCS bucket, which can then be processed by your billing system. This allows you to use Omnistrate for usage metering while keeping your existing billing system intact.
You will need to configure below properties to better display your billing provider in the Customer Portal:
- Name: The name of the billing provider.
- Logo: The logo of the billing provider.
- Balance Due Link: The link to the balance due page of the billing provider. This is where your customers will be redirected to pay their invoices.
Configure Pricing And Billing Providers
Once the billing is enabled at an account level, you can configure the pricing for your service at a per-plan basis. You can configure the pricing for the following pre-set dimensions:
- CPU Cores
- Allocated Memory
- Allocated Storage.
In addition, you can restrict your customers from creating an instance if they had not configured payment.
You can configure the pricing for your Plan through the UI or through the compose spec.
- To configure this from the GUI, navigate to the "Build Service > Plans" section and modify the Plan you want to configure.
- To configure this for your compose spec, find the
pricingspecifications here in thex-omnistrate-service-plansection.
You will also need to choose the billing providers for your Plan. You can choose any billing providers that you have configured at the account level. And set the default billing provider that will be used for your new subscribers.
Note
Above configurations that applied to the Plan level won't be applied to the existing subscriptions. You can always manage and update the existing subscriptions to apply the new configurations at the FinOps Center > Tenant Pricing section.
Configure Quotas
As part of the billing configuration, you can set quotas for your customers. You can set the maximum number of instances that your customers can create for a given plan and restrict customers from creating resources if they had not configured payment at Plan level.
You can configure this through the UI or through the compose spec.
- Using the UI, navigate to the "Build Service > Plans -> Modify Plan", and configure the quotas in
BillingandAdditional Configurationsections. - Using the compose spec, find the
validPaymentMethodRequiredandmaxNumberOfInstancesAllowedspecifications here in thex-omnistrate-service-plansection.
Note
Above configurations that applied to the Plan level won't be applied to the existing subscriptions. You can always manage and update the existing subscriptions to apply the new configurations at the FinOps Center > Tenant Pricing section.
Configure Invoices
Once the billing is enabled, Omnistrate will automatically generate invoices in Stripe for your customers based on their usage at the end of the month. The invoices will be generated based on the usage data collected by Omnistrate and will be created in Draft for your review.
Optionally, you can provide a billing product ID for your Plan, which will be used to create the Plan product in Stripe.
- Using the UI, navigate to the "Build Service > Plans -> Modify Plan" and configure the
External product IDin theBillingsection. - Using the compose spec, find the
billingProductIdspecifications here in thex-omnistrate-service-plansection.
To manage the monthly invoices and approve them, navigate to "Manage Fleet" section of the UI and click on "Manage Invoices". If you would like to auto-approve all your generated invoices after a certain period, please request through support.
Note
Stripe will allow you to modify invoices in Draft mode. After the invoices are sent to customers you can create a revision, invalidating the previous invoice and creating a new one.
Customer Notifications
Stripe will automatically notify your customers about their Open invoices. The notifications will be sent to the email address provided by your customers.
Your customers will be able to track their usage and invoices through the customer portal. Your customers will have the ability to configure payments with Stripe and pay their invoices through the Customer Portal.
Integrate with existing billing system
Alternatively, a SaaS Provider may enable "Omnistrate Metering" to collect usage data and integrate with your billing system. The usage data will contain a line for each billing dimension and will include information about the cloud, region, and customer that used the service. The information for all your clouds and services that you have is collected in a single S3 or GCS bucket, allowing you to have a centralized view of the usage and process the billing information.
To enable metering for your SaaS, follow these steps:
- Grant privileges to Omnistrate to write to your S3/GCS bucket
- Enable metering export on your Plan from UI or your compose spec
- Using the UI, navigate to the "Build Service > Plans -> Modify Plan" and configure the bucket name in the
Meteringsection. - Using the compose spec, find the
meteringspecifications here in thex-omnistrate-service-plansection.
- Using the UI, navigate to the "Build Service > Plans -> Modify Plan" and configure the bucket name in the
Usage metering data from Omnistrate can be integrated with your existing billing system or used to manually generate invoices. The usage data generated by Omnistrate might require custom transformations as mandated by your billing provider. Omnistrate provides a data structure that allows to perform the required transformations in a simple way.
Enabling metering integration for S3 (AWS)
-
Create a bucket in S3
To create a bucket in Amazon S3, you need to log in to the AWS Management Console, navigate to the S3 service, and click on the "Create bucket" button. In the dialog that appears, provide a unique name for your bucket, select the AWS region where the bucket will be hosted, and configure the options such as versioning, encryption, and access control settings. Once you have configured the desired options, click "Create" to finalize the process. The newly created bucket will now be available for uploading files and managing your data. You can also create a bucket using the AWS CLI or SDKs.
Note
If there is no location restriction we recommend using us-west-2 as bucket location.
-
Grant privileges
To set a bucket policy in Amazon S3, navigate to the S3 console, select the desired bucket, and go to the "Permissions" tab. Under the "Bucket Policy" section, you can add a JSON policy to define access permissions for the bucket. This policy specifies who can access the bucket, what actions they can perform, and on which resources. After writing the policy, click "Save" to apply it. You can also use the AWS CLI or SDKs.
{
    "Version": "2012-10-17",
    "Statement": [
        {
            "Effect": "Allow",
            "Principal": {
                "AWS": "arn:aws:iam::498789612402:root"
            },
            "Action": "s3:PutObject",
            "Resource": "arn:aws:s3:::[bucketName]/*"
        }
    ]
}
Note
498789612402 is the service account used by Omnistrate to export the data.
-
Configure bucket name in your Product Offering
You can add the configuration on the Plan through Omnistrate API/UI. Only the bucket ARN is required.
Enabling metering integration for GCS (GCP)
-
Create a bucket in GCS
To create a bucket in Google Cloud Storage, log into the Google Cloud Console, go to the "Storage" section, and click "Create bucket." Choose a unique name, select a storage class and region, and configure any additional settings. Click "Create" to finish. Alternatively, you can use Google Cloud CLI or the Google Cloud APIs to create the bucket.
-
Grant privileges
To grant privileges to Omnistrate to write to the bucket you need to manage the permissions on the bucket and grant Storage Object Admin to [email protected]
Note
[email protected] is the Service Account used by Omnistrate to write to the bucket. You can restrict access only to the required bucket and provide Storage Object Admin privilege only for that bucket.
-
Configure bucket name in your Product Offering
You can add the configuration on the Plan through Omnistrate API/UI. Only the bucket name is required.
Enabling metering integration for Azure Blob Storage
Exporting billing data to Azure is not yet available. Please reach out to support@omnistrate.com if you need it for your use case.
Data structure
Each exported file contains an array of JSON objects, each representing metering data for a specific instance.
[
   {
       "timestamp": "2025-02-27T08:00:16Z",
       "organizationId": "org-xxx",
       "customerId": "user-xxx",
       "organizationName": "",
       "customerEmail": "[email protected]",
       "subscriptionId": "sub-xxx",
       "externalPayerId": "xxx",
       "serviceId": "s-xxx",
       "serviceName": "example-service",
       "serviceEnvironmentId": "se-xxx",
       "serviceEnvironmentType": "Dev",
       "productTierId": "pt-xxx",
       "productTierName": "Basic",
       "hostClusterId": "hc-79g18pwru",
       "instanceId": "instance-dxe51cv37",
       "podName": "rediscluster-replicas-0",
       "instanceType": "t4g.small",
       "hostName": "ip-172-0-33-151.ca-central-1.compute.internal",
       "dimension": "metricA",
       "value": 1
   },
   {
       "timestamp": "2025-02-27T08:00:16Z",
       "organizationId": "org-xxx",
       "subscriptionId": "sub-xxx",
       "customerId": "user-xxx",
       "customerEmail": "[email protected]",
       "externalPayerId": "xxx",
       "serviceId": "s-xxx",
       "serviceName": "example-service",
       "serviceEnvironmentId": "se-xxx",
       "serviceEnvironmentType": "Dev",
       "productTierId": "pt-xxx",
       "productTierName": "Basic",
       "hostClusterId": "hc-79g18pwru",
       "instanceId": "instance-dxe51cv37",
       "podName": "rediscluster-master-0",
       "instanceType": "t4g.small",
       "hostName": "ip-172-0-33-151.ca-central-1.compute.internal",
       "dimension": "metricB",
       "value": 2
   }
]
Storage Path Format
Files are stored per subscription in the following folder structure:
/omnistrate-metering/{service-name}/{environment}/{service-plan-id}/{year}/{month}/{day}/{hour}/{subscription-id}.json
Example:
There is a single file per subscription per hour, but the file will be updated before the end of the hour in case of suspension.
Understanding the JSON File Structure
Each exported JSON file contains an array of records, with one entry per pod per hour per dimension (metric). This ensures granular tracking of service usage at the instance level. Below is a breakdown of each field:
- timestamp – The latest update time for the recorded usage, in ISO 8601 format (YYYY-MM-DDTHH:MM:SSZ).
- organizationId – A unique identifier for the organization that owns the subscription.
- customerId – Represents the customer associated with the subscription.
- organizationName – The name of the organization.
- customerEmail – The email address of the customer associated with the subscription.
- subscriptionId – A unique identifier for the subscription that the service is being used under.
- externalPayerId – A reference to the external billing entity responsible for payments. This value can be passed optionally during the instance creation.
- serviceId – A unique identifier for the service generating usage data.
- serviceName – The name of the service.
- serviceEnvironmentId – A unique identifier for the environment (e.g., Dev, Prod) where the service instance is running.
- serviceEnvironmentType – The environment type, such as "Dev", "Staging", or "Production".
- productTierId – A unique identifier for the product tier (e.g., Free, Basic, Enterprise) associated with the subscription.
- productTierName – The name of the product tier.
- hostClusterId – The ID of the host cluster where the instance is deployed.
- instanceId – A unique identifier for the specific instance running the service. This is a key field for identifying unique records.
- podName – The name of the Kubernetes pod that is handling the workload. Each pod generates a separate record per hour.
- instanceType – The type of instance running the service, such as "t4g.small".
- hostName – The hostname of the instance, often referring to a cloud VM or compute node.
- dimension – The specific metric being recorded (e.g., CPU usage, memory consumption).
- value – The recorded metric value, representing the maximum usage observed during the hour.
Since each file includes one record per pod per hour, multiple entries can exist for the same instanceId if it has multiple running pods. This design allows for detailed usage tracking and enables customers to analyze metering data at a fine-grained level.
Processing the Exported Data
Customers can process the exported JSON files using:
- Data Warehouses: Load data into BigQuery, Snowflake, or Redshift for analysis.
- ETL Pipelines: Process data using Apache Spark, AWS Glue, or Google Dataflow.
- Billing Systems: Integrate with financial reporting tools for customer invoicing.
Querying and Analyzing Exported Data Based on Folder Structure
The exported data is stored in a structured folder hierarchy that allows for easy aggregation and querying. Understanding the storage path format helps in organizing and retrieving data efficiently. Files are stored per subscription in the following folder structure:
/omnistrate-metering/{service-name}/{environment}/{service-plan-id}/{year}/{month}/{day}/{hour}/{subscription-id}.
json
-
View Usage Per Subscription
To get a full view of a subscription's usage over time, you can retrieve all files under:
/omnistrate-metering/{service-name}/{environment}/{service-plan-id}/{year}/{month}/{subscription-id}.jsonApproach: Aggregate all JSON files for a subscription within the desired time range.
Example: To get usage for a subscription in February 2025:
-
Scan files from /2025/02/
-
Aggregate value fields for relevant dimensions.
-
-
Monthly Compute & Memory Usage Summary
To compute total CPU and Memory usage across all subscriptions in a given month, process all files under:
Approach:
-
Read all files in /2025/02/ to cover the entire month.
-
Sum up value for dimensions like CPU and Memory.
-
-
View Usage Per Organization & Product Tier
To analyze usage at the organization or product tier level, scan across all subscriptions and group by:
/omnistrate-metering/{service-name}/{environment}/{service-plan-id}/{year}/{month}/{subscription-id}.jsonApproach:
-
Read all files under /2025/02/ to get full monthly data.
-
Aggregate usage based on organizationId and productTierName.
-
By structuring queries around the folder hierarchy, customers can efficiently retrieve and process usage data for subscriptions, compute & memory consumption, among other metrics, and organizational breakdowns.
External Billing ID
For more complex scenarios, your billing system may require adding specific customer billing details to usage records. SaaS Providers can accommodate this by assigning an external billing id when creating resource instances for customers.